

Setting Up Email for the Apple iPhone (iOS 9 or earlier)
In the directions below, wherever it says “yourdomain.com” substitute with your domain name. Follow these steps to set up your email on your iPhone.
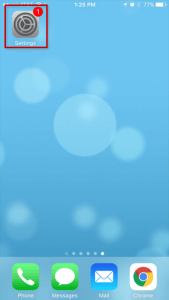
1. Firstly, tap the “Settings” app.
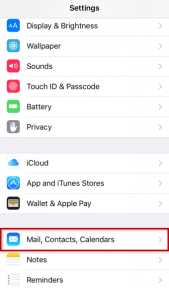
2. Secondly, tap “Mail, Contacts, Calendars“.
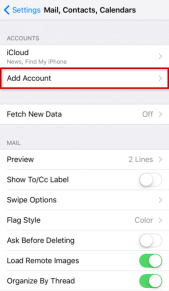
3. Next, tap “Add Account…”
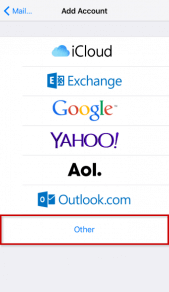
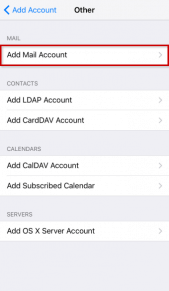
4. Tap “Other” (bottom option)
5. Proceed by tapping “Add Mail Account“
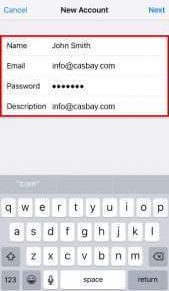
6. After going into New Account, please enter Name, address (full email [email protected]), and password.
(iPhone will attempt to guess your settings. Allow ~1 minute for it to fail.)
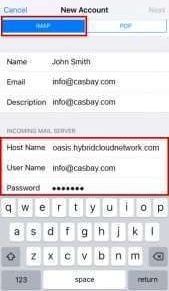
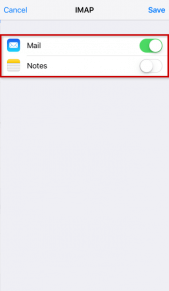
7. Select IMAP.
(It is the default. The option you’ve selected will be highlighted blue.)
8. Under “Incoming mail server”
i) Set “hostname” to mail.yourdomain.com
(or your server host name or server’s IP address)
ii) Set “username” to [email protected]
iii) Set “password” to your password
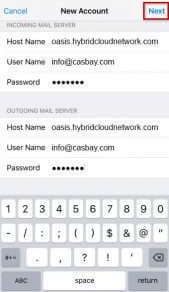
9. Under “Outgoing mail server”
i) Set “Host Name” to mail.yourdomain.com
(or your server host name or server’s IP address)
ii) Set “User Name” to [email protected]
iii) Lastly, set password to your password
You are now ready to send and receive emails via your iPhone.
( If mail.yourdomain.com is not working for the incoming and outgoing server, you can try your IP address or server’s host name. You can find your server name and IP in your welcome email or by contacting support. )
Your server host name would look something like infinity.casbay.net or something similar. Check your welcome email for the exact host name or contact support to find out what it is.
Older Versions of iPhone
Although most email settings are identical, the iPhone requires a special setting for the incoming and outgoing mail servers. Instead of using the defaults that are typically used in the email settings replace mail.yourdomain.com with yourservername.casbay.net
If you aren’t sure of the name of your server you can usually find it in the Stats on the left hand side of your cPanel. If you don’t see it immediately, you can also try pressing CTRL+F and typing in “server name” and pressing enter. This should highlight and take you to the correct area. If you are still unable to find your server name you can contact one of our support agents via chat or phone and they will be happy to retrieve that information for you.
1. Press the Home button and select Settings > Mail, Contacts, Calendars.
2. Under Accounts, select Add Account…
3. Select Other.
4. Enter your name (which will show in the from the field) and your full email address.
5. Enter your email password and description (we recommend the full email address as your description).
6. Press Save.
7. Select IMAP
8. Under Incoming Mail Server, enter yourservername.casbay.net as the Host Name. (Resellers use yourservername.websitewelcome.com. If this doesn’t work try using your server’s IP address. VPS and Dedicated use your server’s IP address.)
9. Enter the full email address as your User Name.
10. Enter your email password and then scroll down.
11. Enter the same information under ‘Outgoing Mail Server’.
12. Press Save.
You are now ready to send and receive emails via your iPhone.
Troubleshooting
Problem 1: I Cannot See My IMAP Folders
Solution: Please read the Apple support page. to learn about what you should do if IMAP Mail folders are not visible.
Problem 2: What is the IMAP Path Prefix?
Solution: The correct code is INBOX (all caps).
Problem 3: I Cannot Delete Emails
Solution: By default, iOS attempts to delete IMAP email by putting it in the phone’s trash. This causes an error to come up saying that the messages could not be moved to the trash folder. To fix this:
Problem 4: Too Many Connections – 500 Errors?
On the iPhone there is a function called “push,” and when it is enabled it keeps the connection to our server open and continually checks mail. Consequently, this creates many IMAP processes and eventually conflicts with our Terms of Service.
To avoid running excessive IMAP processes, you can disable push when you don’t need it.
1. Go to Settings > Mail, Contacts, Calendars > Fetch New Data.
2. Toggle Push to Off.
Now, instead of retrieving emails continuously as they arrive, your iPhone will use the global Fetch setting to retrieve emails manually or at intervals.
For the solutions to set up email on the iPhone with other versions of iOS, you can read the following articles:
Setting Up Email for the Apple iPhone- iOS 13 & iOS 14 // Setting Up Email for the Apple iPhone- iOS 11 & iOS 12 // Setting Up Email for the Apple iPhone- iOS 10

