

HOW TO: Manage categories in WordPress
Categories in WordPress is the term the user uses mainly for separating the theme of your post or their contents from one another and grouping them by certain criteria. In this tutorial, we will guide you to manage categories in WordPress.
What is: Category
You can use categories to sort and group your blog posts into different sections. For example, a news website might have categories for their articles filed under News, Opinion, Weather, and Sports.
Categories help visitors quickly know what topics your website is about and allows them to navigate your site faster.
The default category in a new WordPress installation is “Uncategorized“. If you don’t pick a category for a post, then it automatically places the post into the default category. Only a WordPress administrator can change the default category from the Settings » Writing screen.

Steps to Manage Categories in WordPress
Step 1
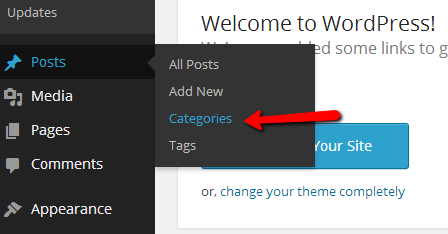
Firstly, click Posts in the left margin.
Step 2
Then click Categories. This is where you can add a new category… let’s do that now.
Step 3
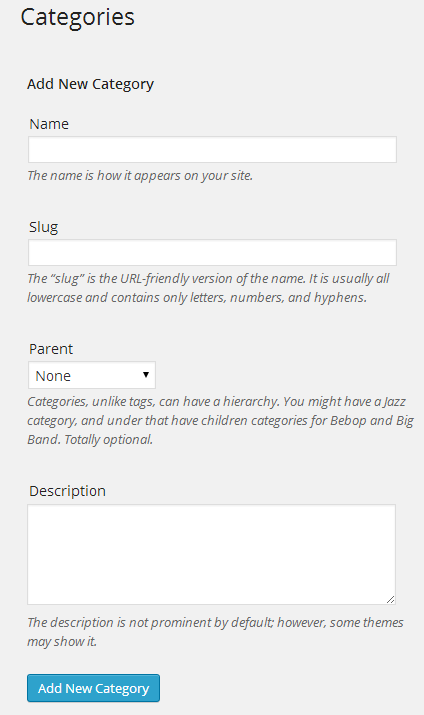
When ready, click Add New Category.
Once you access the Categories page you will notice that the page consists of two parts. The first part is for adding a new category. There are few fields on this part of the page and we will address them all.
- Name – The actual name of the category. Note that you will see this on your website if you enabled the option for displaying the categories of course.
- Slug – The URL friend name of the category. This name will be displayed in the URL when the certain category is accessed.
- Parent – If the newly created category will be a child or subcategory to an already existing category this drop-down is exactly for choosing the Parent category.
- Description – The description of a category. Note that this is not mandatory however some custom templates you have downloaded might be showing this item.
Step 4
Once you filled up all these fields, please use the Add New Category button at the bottom, below the Description field.
Step 5
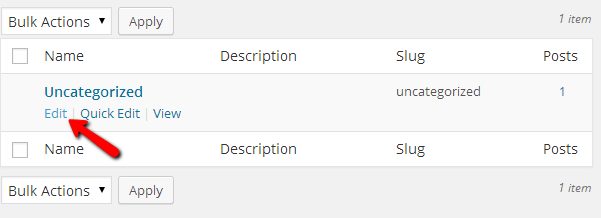
Then clicking Edit.
That option will redirect you to a page that is exactly the same as the left part of the Categories page for adding a category with the simple difference that the fields Name, Slug, Parent, and Description will be already filled with the current information for the category you are editing.
Step 6
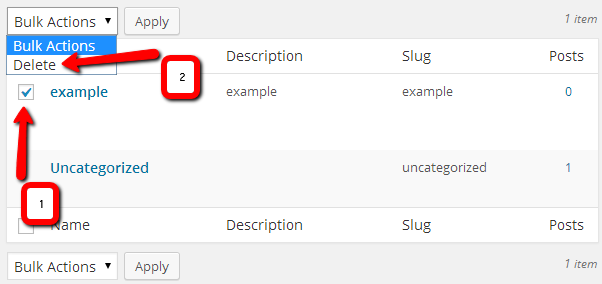
You can also delete a category this way.
First you will need to use the checkbox of the category you would like to delete and then use the Delete action from the dropdown list. Once you hit the Apply button the category you have selected will be permanently deleted.
Congratulations! You now know how to manage categories in WordPress.

