

Google Analytics is a decent tool to help you to grow your business and it is totally free. There are several good reasons to utilize it for your business website. Firstly, as mentioned above, it is free so you don’t need to purchase and provide credit card information. Besides, it provides real-time data and can generate reports hourly, daily, monthly, yearly, and year over year. Moreover, you can keep track of the trend across a certain time frame. It allows you to take note of the peak times for your potential customers, in order to post your pages, campaigns, or blog articles at the right time to gather more interest.
Below are some procedures for you to start using Google Analytics on your website:
Step-by-step guide
Step 1
Firstly, sign up at www.google.com/analytics/ or sign in to Google Analytics with your current Google username and password. Click on Access Analytics or click Create an Account now if you do not have a Google Account.
Step 2
After that, if you are signing for the first time, you will be required to type in your website address. An account name for your website, your country, and your time zone as well as your contact information.
Step 3
Next, you will be asked to read and accept the user agreement for Google Analytics. Before you can finish creating an account for Google Analytics.
Step 4
The next step is to add the tracking code. The tracking code is a string of HTML code you will copy and paste on every page of your website you want to track statistics for. After logging in, you will be taken to the Overview page that shows your website accounts.
Step 5
And afterwards, elect the account you want and from the Actions column, click on Edit.
Step 6
In the top right section of the Main Website Profile Information box, click on Check Status. You can find your tracking code underneath Instructions for adding tracking.
Step 7
Once you have the Javascript tracking code snippet for your property, copy the snippet exactly without editing it. Paste your tracking code snippet into your website header, so that the snippet appears before the closing.
Step 7
Once you have the Javascript tracking code snippet for your property, copy the snippet exactly without editing it. Paste your tracking code snippet into your website header, so that the snippet appears before the closing.
Step 8
To make sure Google Analytics will begin tracking your website data, return to the Overview page that shows your website accounts. Select the account you want and from the Actions column. Click on Edit. In the top right section of the Main Website Profile Information box, click on Check Status. In the Tracking Status Information box, you will be able to verify whether or not your tracking code was properly installed.
Step 9
Lastly, allow 24 hours for Google Analytics to begin tracking your website data.
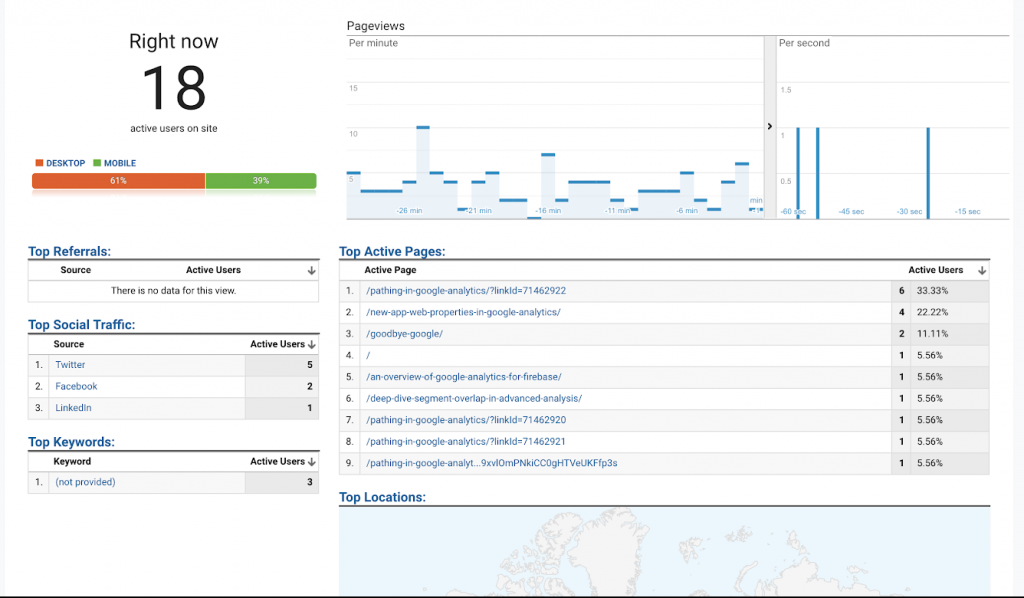
A sample of Google Analytics Report

