

What is AutoSSL?
AutoSSL is WHM/cPanel solution activated by default in your hosting account as it automatically installs and renews cPanel/Sectigo certificates for each domain in cPanel.
AutoSSL performs an automatic check of all domains and if necessary install new or renews the already installed cPanel/Sectigo certificates.
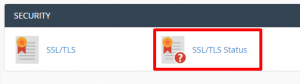
You can easily check, manage or exclude a specific domain from AutoSSL through cPanel » SSL/TLS Status.
All Casbay cPanel hosting plan comes with free Auto SSL.
AutoSSL performs an automatic check of all domains and if necessary install new or renews the already installed cPanel/Sectigo certificates.
You can easily check, manage or exclude a specific domain from AutoSSL through cPanel » SSL/TLS Status.
All Casbay cPanel hosting plan comes with free Auto SSL.
How to enable AutoSSL / Free SSL in cPanel
Make sure the website is pointing to your server with us. Use a DNS checker to make sure the IP address of the A record is the same as your server IP.
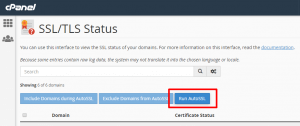
1. Login to cPanel and select SSL/TLS Status.
1. Login to cPanel and select SSL/TLS Status.
2. Next, select Run AutoSSL.
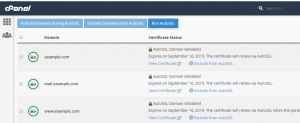
3. You may have to wait for 1 hour for the free SSL installation. Make sure to check the “+ Include during AutoSSL” under the chosen domain/subdomain in the list of domains.
How To Install Let’s Encrypt SSL Certificate in cPanel
- Firstly, access your website cPanel using http://yourdomain.com:2083 or http://yourdomain.com/cpanel
- Under the Security section, click on Let’s Encrypt SSL icon. *Contact your hosting provider if you cannot find the Let’s Encrypt SSL icon.
- Next, click on ” +Issue “ for the domain you want to secure under Issue a new certificate section.
- Then, tick the options for your domain name (non-www and www) and mail server (mail.domainname.com). Choose http-01 as the validation method.
- Lastly, click the Issue button when everything is done.
- Your website will be accessible with https:// in seconds!
The following message will be displayed after the installation is successful:
– The SSL certificate is now installed onto the domain “yourdomain.com” using the IP address. Apache is restarting in the background. –
Check out next article on HOW TO: Add a domain forwarder in Plesk.

