

HOW TO: Enable/Disable SpamAssassin
What is SpamAssasin?
SpamAssassin is a free anti-spam tool comes with all cPanel and WHM installations to filter out incoming email on a server side basis.
SpamAssassin works for all email accounts in cPanel. It can be used to mark spam messages, so you can easily notify them. You can also choose to set up the SpamAssassin to automatically delete any spam emails.
We recommend to activate SpamAssassin as soon as you create an email account or log in for the first time.
To Enable/Disable SpamAssassin
- Log into cPanel.
- Next, click the SpamAssassin icon in the Mail section.
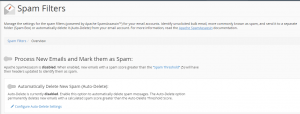
- In the gray box, click Enable SpamAssassin to enable; or click Disable SpamAssassin to disable.
**You will receive a confirmation message on the next page, depending on the option you selected, stated that SpamAssassin was either enabled or disabled.
Spam Score Limit
SpamAssassin scans each incoming email message and scores it according to the spam characteristics. By default, SpamAssassin rates messages with a score of 5 as spam; however, you can adjust the spam score limit based on your preference:
Score 1 – everything incoming will be marked as spam.
Score 5 – the default spam score for SpanmAssassin.
Score 10 – any message with a score of 10 or less will not be marked as spam.
To change the default spam score:
- Click Configure SpamAssassin under SpamAssassin Configuration.
- In the required_score field, enter your preferred value.
- Lastly, click Save at the bottom of the page.
**The changes will be applied to all email accounts in your cPanel.
Email Filtering
You can use Spam Box or email filtering in SpamAssassin to move spam from your inbox to another folder.
Spam Box
A spam folder will be created when Spam Box is enabled. Spam is then delivered directly to this folder, allow you to review and manage all spam mail before it is deleted. To enable Spam Box, simply click Enable Spam Box in the Spam Box section.
User Level Filtering
The settings for SpamAssassin are applied to all email accounts in your cPanel. However, you can also use filtering for individual email account to direct spam for that account.
To enable individual email account filtering:
To enable individual email account filtering:
- First, log into webmail.
- Create a folder named spam and exit webmail.
- In the Mail section of cPanel, select User Level Filtering.
- Click on Manage Filters next to the appropriate user.
- Select Create a New Filter. You will be redirected to a new page.
- In the Filter Name field, enter a name for the filter.
- Under Rules, select Spam Status from the drop-down menu.
Note: If this option is not available, make sure that Spam Assassin is enabled. - In the adjacent drop-down menu, select begins with.
- Next, type the word Yes in the blank box below the drop-down menus.
- Under Actions, select Deliver to folder.
- Click Browse and select the “spam” folder.
- Lastly, click Create.
Check out the next article on HOW TO: Set up Domain Redirection in cPanel.

