

How to configure your router
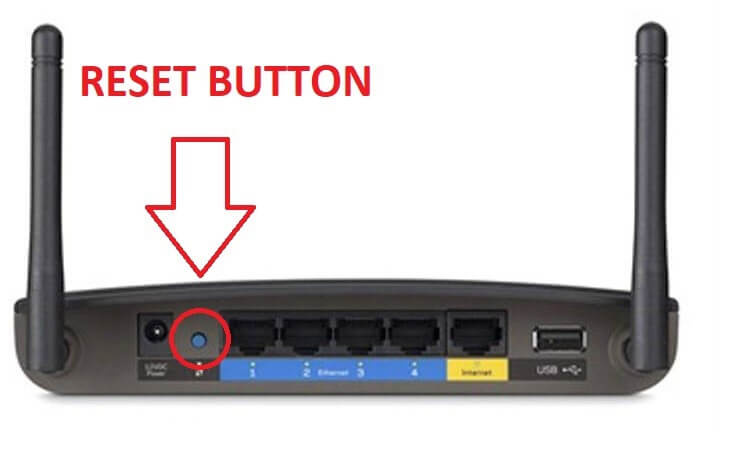
Step 1: Resetting
- Connect the power cord
- Unplug ALL Ethernet connections
Hold down the reset button for at least 15 seconds
Step 2: Cable Setup
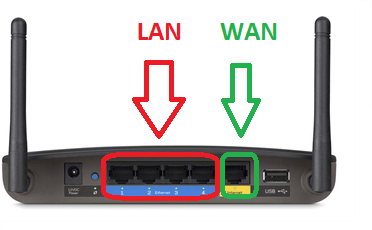
- Connect your computer (PC or MAC) to the WAN port, only
DO NOT connect the wall port to any port on the Router yet!
DO NOT use the LAN ports

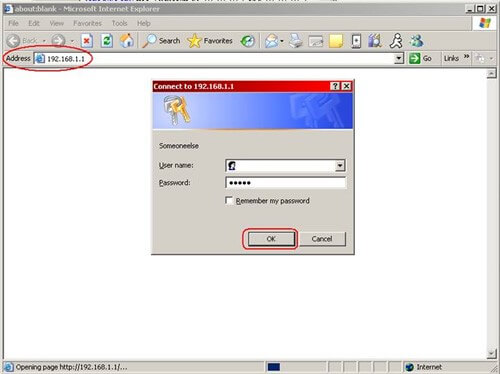
Step 3: Accessing Router
- Open your browser (Chrome, Firefox, Safari, etc) with the computer connected to the Router
- Enter the IP address found in your wireless settings (Settings>Wi-Fi>Hardware Properties for Windows 10/ Network Preferences for Macs) into the Address Bar of your browser. Most IP addresses start with 192.168. Push Enter.
- User name is often blank or “admin”. Password is often blank, “admin”, or “password”
- Password is often blank, “admin”, or “password”
- Click “OK”
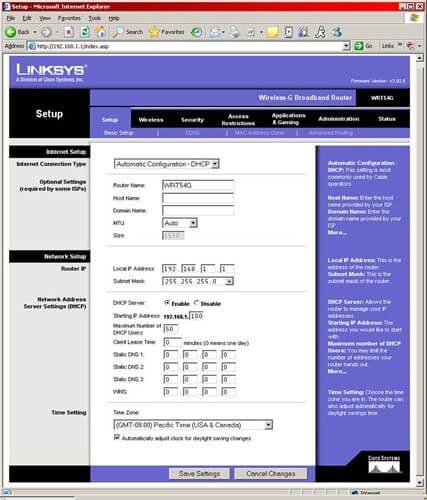
Step 4: Default Screen
Step 5: Configure Wireless SSID
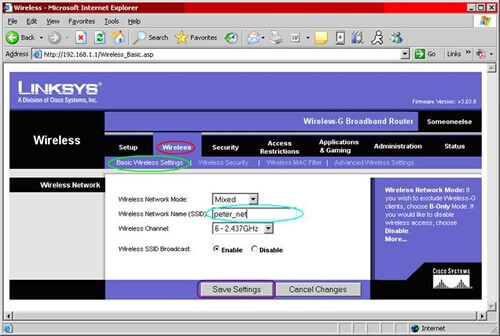
- Click “Wireless”
- Click “Basic Wireless Settings”
- Enter a desired name into the “Wireless Network Name (SSID)” field
- Write down your Wireless Network SSID, it will be used for later. Do not share your SSID or password with anyone unless you trust them. Users can piggyback on your credentials and crowd your network.
- Click “Save Settings”
Step 6: Configure Wireless with WPA Security Key
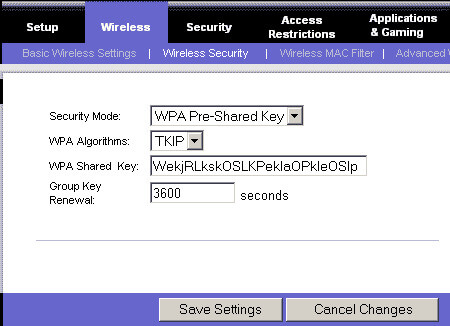
You must secure your wireless network, failure to do so may result in disconnection by ResNet. Your Security Mode should be using WPA or WPA-2.
For WPA
- Click “Wireless”
- Click “Wireless Security”
- Select “WPA Pre-Shared Key” in the “Security Mode” field
- Set the “WPA algorithm” to “AES”
- (if available) otherwise, use “TKIP”
- Type in your WPA Shared Key. It should be between 8 and 32 characters- the longer the better. Make sure it is something you can remember but that is hard to guess. You may want to write it down, temporarily, so that you can remember it for when you configure your computer to connect to the now-secure access point.
- Click “Save Settings”.
Step 7: Final Cable Setup
- Connect your computer (PC or MAC) to the WAN port only, DO NOT use the
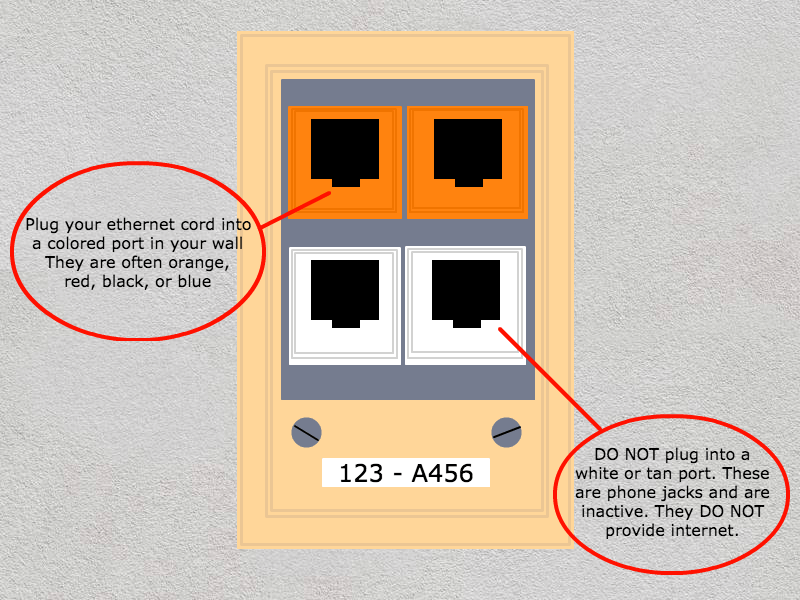
LAN ports - After that, connect to a colored port in your wall (tan/white ports are phone jacks and DO NOT provide internet).
- Note that some locations on campus have been upgraded to a solely wireless system and so do not require a router and therefore have no active ethernet ports.
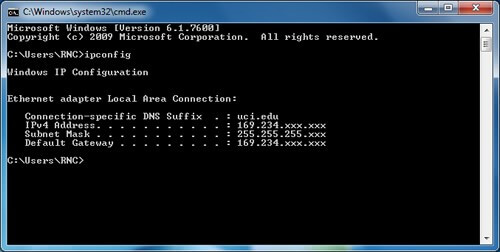
Step 8: Verification
- Restart your computer
- On the desktop goto “START” >>> “RUN”, type “cmd” under the Open field, and click “OK”
- For Windows: Type “ipconfig /release” into the black screen and push “Enter”, then type “ipconfig /renew” into the black screen and push “Enter”
- While on Macs, simply check your Network Preferences again to find your updated IP address
- Lastly, your IP Address should now begin with 169.233.xxx.xxx, if this is NOT the case go back to Step 1 and try again.
After follow all this step, you finally succes to configure your router.
*Again, if you experience trouble configuring your router, please BRING IT TO RESNET FOR CONFIGURATION. Unconfigured or misconfigured routers can cause larger network issues on campus.*
Check out the next post on How to Protect Your Website from DDoS Attacks.